Deep cleaning a vehicle is not merely an aesthetic choice; it is a fundamental maintenance task that preserves the longevity of the interior materials and ensures a healthy environment for the driver. Utilizing a high-quality car vacuum cleaner is the cornerstone of this process, allowing you to remove deeply embedded debris that standard cleaning misses. A professional-grade car detailing routine requires precision, the right tools, and a systematic approach to handle everything from floor mats to the intricate crevices of the dashboard.
To achieve showroom results, you must prioritize suction power and maneuverability. A handheld vacuum cleaner specifically designed for automotive use provides the agility needed to reach under seats and between tight gaps where allergens and dust accumulate. By following a structured step-by-step guide, you transform a mundane task into a value-adding investment for your vehicle. This guide focuses on maximizing efficiency using modern cordless vacuum technology to ensure no corner is left untouched, providing a pristine finish that lasts.
1. Decluttering and Preliminary Trash Removal
Before engaging your car vacuum cleaner, you must clear the canvas by removing all large items and loose trash. Check under the seats, inside door pockets, and within the center console to ensure the vacuum intake doesn’t get clogged by coins or wrappers. Removing floor mats at this stage is non-negotiable; they require separate, vigorous cleaning to release trapped grit.
Once the cabin is empty, use a stiff brush to agitate the carpet fibers and seat upholstery. This mechanical action brings deeply buried sand and dust to the surface, making the subsequent vacuuming phase significantly more effective. Preparation is 50% of the job in professional car detailing, ensuring that your equipment performs at its peak without unnecessary interruptions.
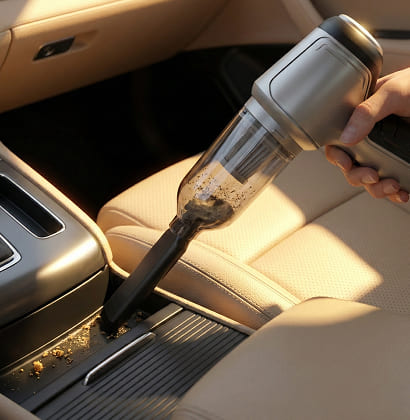
2. High-Power Vacuuming: From Top to Bottom
The golden rule of interior cleaning is working from the ceiling down to the floor to prevent re-contaminating clean areas. Start by using your handheld vacuum cleaner on the headliner and the tops of the seats, using a soft brush attachment to prevent fabric pilling. This ensures that any dust disturbed during the process eventually falls to the floor, where it will be captured in the final pass.
Focus heavily on the “transition zones”—where the seat meets the backrest and the tracks where the seats slide. These are magnets for crumbs and organic waste that can cause odors over time. A cordless vacuum with a crevice tool is essential here, providing the high-power suction needed to extract debris from the narrowest channels without the hassle of a power cord.
3. Dashboard and Console Detailing
The dashboard is the focal point of your car’s interior and requires a delicate balance of suction and wiping. Use a micro-vacuum attachment or a soft-bristled brush to clear dust from air vents, button clusters, and gear shifters. Dust acts as an abrasive, so removing it before applying any liquid cleaners is vital to prevent micro-scratches on plastic surfaces.
- Vents: Use a brush tool to flick dust out while holding the vacuum nozzle nearby.
- Cup Holders: Remove rubber inserts and vacuum the base thoroughly.
- Screens: Use only dry microfiber after vacuuming to avoid streaking sensitive displays.
4. Deep Fabric and Upholstery Care
Cloth seats trap odors and stains more aggressively than leather, necessitating a deep-extraction approach. After the initial vacuuming, apply a dedicated upholstery cleaner and let it dwell for a few minutes. Use your handheld vacuum cordless model to pull the moisture and loosened dirt out of the fabric, ensuring the seats dry quickly and remain smelling fresh.
For leather interiors, the focus shifts to the seams. Dust and sand act like sandpaper on leather stitching, eventually causing them to fail. Use a specialized nozzle to vacuum every seam line before applying a conditioner. This preventative maintenance, powered by a strong suction vacuum, is what separates a basic wash from a professional detail.
5. Final Floor and Mat Restoration
The final stage involves the heavy-duty cleaning of the floor carpets and the mats you removed earlier. Since these areas endure the most foot traffic, they require multiple passes with a high power vacuum. Scrub the mats with a brush to break up dried mud, then vacuum them until no visible particles remain.
- Pedal Area: Use a stiff brush to clear debris from the rubber or metal pedals.
- Under Seats: Slide seats fully forward and backward to reach the hidden “no-man’s land.”
- Trunk: Don’t forget the cargo area, as it often harbors hidden pet hair and dirt.
| Category | Tool Required | Focus Area | Frequency |
| Initial Sweep | Manual / Brush | Large Debris & Mats | Bi-Weekly |
| Main Vacuuming | High Power Cordless | Seats & Carpets | Weekly |
| Detailing | Crevice Tool / Brush | Vents & Crevices | Monthly |
| Fabric Extraction | Handheld Vacuum | Stains & Odors | Quarterly |
")
")